
Customers
 Click one of the links listed above
to jump to a section on this page.
The Customer record is the basic building block of the CRM. It's where all of the information related to a customer is stored. A Customer record must exist before any billing or fulfillments can be processed in OrangeCRM for a customer.
Customer records can be created via the API, a lead file upload or the OrangeSOAP module.
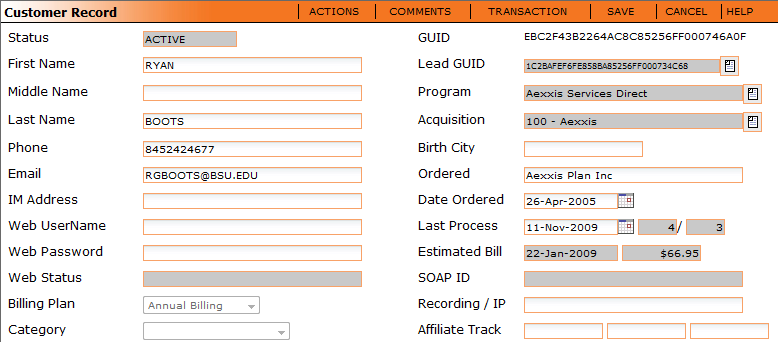
Under the Customers menu tab on the main navigation page, there are three choices as to how you can list your customers: By Status; By Last Process; or By Created Date. Selecting one of these views will bring up a Customer list like the one seen below. Double clicking any customer on this list will bring up that customer's record.

Status
The status of the customer which can be one of the following: New, Pending, Trial, Active, Billing, Suspended, Canceled, CSR Canceled, or Archived.
HIGH RISK/LOW RISK
If this customer is high risk rated or low risk rated a label will appear next to the status. For more information, see the High Risk Customers section on this page and the What Are Warning BINs section in the Banks topic.
First Name
The customer's first name.
Middle Name
The customer's middle name.
Last Name
The customer's last name.
Phone
The customer's phone number.
The customer's email address.
IM Address
The customer's IM address.
Web UserName
If you have set up the customers for using the web interface, their username will go here.
Web Password
The password set for the web interface.
Web Status
If the user is setup for web access, it will be seen here.
Billing Plan
The billing plan the user is set on. See Actions Menu below.
Category
If you have chosen to categorize your customers, it will be noted here. See the section on categories in the Customers topic.
GUID
GUID stands for Globally Unique Identification. Each customer is assigned a unique 32 character alpha-numeric ID, which can be referenced in whole or in part when performing customer searches, in fulfillments, when updating customer records via API, etc.
Lead GUID
The unique number given to the lead that is attached to this customer. By clicking the box, you can follow this record.
Program
The program that is attached to this customer. By clicking the box, you can follow this record.
Acquisition
The acquisition center that is attached to this customer. By clicking the box, you can follow this record.
Birth City
The Birth City of the customer. This is stored as a security measure for CSRs to confirm the customer.
Ordered
The product that this customer has ordered.
Date Ordered
The date this customer ordered the product.
Last Process
The date the customer was last processed, or billed. See Actions Menu below. The next two fields show the transaction cycle counters. The first one counts the billing cycles based on the transaction being issued and second one counts the successfully paid transaction cycles.
Estimated Bill
The next estimated billing date and billing amount.
SOAP ID
The Sales Order and Acquisition Process ID linked to this customer.
Recording / IP
If the acquisition center has a recording of the customer, it will be shown here.
Affiliate Track
This field tracks the affiliate (source) associated with the acquisition of the customer. This information is only downloaded via the API. The first field is the affiliate code, the second field is the affiliate sub code, and the third field is the salespage. The last field, SalesPage, is used to track the HTML "landing page" used to close internet based sales.
Comments Tab
The Comment tab shows a list of any comments that have been added to this customer record. See also the sections on this page titled What Is a Comment and How To Add a Comment to a Customer Record.

Address Tab

Shipping Address
The customer's shipping address.
Billing Address
The customer's billing address.
Same as Shipping Address
Click in the check box to copy the Shipping Address over to the Billing Address fields.
Account Tab
The account tab contains the specific billing details for the customer.

If you have admin status in the CRM, you can use the Bank Route feature to route this customer to a specific MID or bank.
If the OrangeMoney module has been installed in your OrangeCRM database and you process transactions in multiple currencies, you may use the Currency drop down selector to assign this customer to a specific currency. This will cause transactions created for this customer to inherit that currency and qualify for processing through a Merchant Bank that is configured to process transactions in that same currency. For more information, please see the section titled How To Create a New Merchant Bank in the Banks topic.
 Keep in mind that Customer currency assignments
override Fee Schedule currency assignments. In other words, transactions
will inherit a Customer currency assignment, regardless of the currency
assignment on a Fee Schedule.
 Additionally,
if you don't have the OrangeMoney module and
you use Customer currency assignments,
the Bank Currency assigned to a Merchant Bank will override the Customer
currency assignment. To avoid
this, use static bank routing for each currency that you process. For
instructions, see the sections titled What Are Bank Routes and How To Create a New Bank Route
in the Banks
topic.
There are four different types of account information that can be stored here, as seen below.
1. Credit Card info

Payment Type
The type of payment. Changing this will change the account information options.
Name on Card
The card holders name.
Credit Card
The credit card number.
CC Expire
The credit card expiration date.
AVS
The AVS number on the card.
2. US Bank Info

Payment Type
The type of payment. Changing this will change the account information options.
Account Name
The name of the account.
Routing Number
The routing number to the bank.
Account Number
The account number.
Name of Bank
The name of the bank that the account is held at.
Bank City, State
The address information of the bank that the account is held at.
Bank Account Type
The type of account can be chosen from the drop down selections.
3. Canada Bank Info

Payment Type
The type of payment. Changing this will change the account information options.
Account Name
The name of the account.
Account Number
The account number.
Name of Bank
The name of the bank that the account is held at.
Institution Number
The number to the Canadian institution.
Branch Transit Number
The branch of the banks transit number.
4. Cash

Details Tab
The details tab will contain specific details about the customer.

Acquisition Cost
The cost of acquiring this customer.
Account Code
The payable account code associated with this customer.
API Login Cnt
Can be used to verify the number of times and last date that a customer visited your web site or logged into your web site. See API spec's documentation for the call CUST_Counter.
API Order Cnt
Can be used to verify the number of times and last date that a customer ordered from your web site. See API spec's documentation for call on page 2.
Birth City
This field can be used for security verification to make sure you are speaking with the same customer who created the account on your web site.
Language
The language of the customer. The default is English. A different language can be set by the SOAP Customer API (CUST_ADD, CUST_UPDATE, CUST_QUERY). The details tab now supports ISO-639-3 language codes and is used in connection with multilingual emails. (Click on this link to download our API documentation: CRM API Spec.)
Custom Fields
Custom fields allow you to enter order information on this customer (Favor, Package Size or Amount) This can later be used in for fulfilling, reporting, or in searching for this customer. This is usually entered via an API order form on the web site.
Fulfillments Tab
The fulfillments tab will show all fulfillments that are linked with this customer, as seen below. See the section on Fulfillments.

OrangeTask Tab
The OrangeTask tab will show all service request tickets that have been filled out for this customer and allow you to create new ones. NOTE: You must have an active service requests module for the ticketing feature to function. Please call customer support if you have any questions regarding this feature.

OrangeEvent Tab
The OrangeEvent tab shows a history of all Events performed on the customer record. New Events can also be manually added to this list for users with special permissions (quality control, chargeback management, etc).

Actions Menu
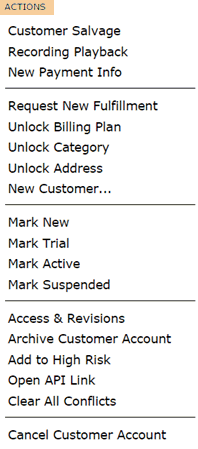
The options that appear in the customer Actions menu vary from user to user based on their assigned permissions. Listed below is a description of each option that is available to users with the highest level of access.
Customer Salvage
This action allows CSRs to perform a Customer Salvage Event. A list of Events that have been assigned to the Customer Salvage type are presented as options for the user to choose from. Examples of a Customer Salvage Event include such actions as Bill Now, Delay Billing by a certain number of days or months, change Billing Plan, etc. For instructions on how to set up and perform a Customer Salvage Event, please see the page titled Events.
Recording Playback
When set up properly, this action will retrieve and play the audio recording of the customer's order. In order for this feature to work, it must be enabled by your system admin. For set up instructions, please see the page titled Recordings.
New Payment Info
Lets CSRs update the customer's payment details such as credit card number, expiration date, etc.
Request New Fulfillment
Creates a new fulfillment request for the customer. Only fulfillments that have been set to allow CSR selection will appear in a list for the user to choose from. Fulfillments that don't allow CSR selection are hidden. See the Fulfillments page for instructions on how to enable/disable CSR selection.
Unlock Billing Plan
Unlocks the Billing Plan field on the customer record and allows a new plan to be selected from the drop down menu. This action reassigns the customer to the selected Bill Plan.
Unlock Category
Unlocks the Category field on the customer record and allows a new Category to be selected from the drop down menu. This action reassigns the customer to the selected Category.
Unlock Address
Unlocks the Address tab on the customer record and allows users to view and edit the shipping address and billing address.
New Customer
Allows another customer record to be created for the same customer. The customer's details are copied from the existing record and auto-filled in a new Lead record. Once the Lead record has been processed successfully, the new customer record will be created.
Mark New, Mark Trial, Mark Active, Mark Suspended
These actions allow you to change the status of a customer. Typically these types of manual status changes are only made under special circumstances, as they affect when and how a customer is billed.
Access and Revisions
Shows you a history log of all edits made to the customer record, including details such as user names, dates and times, etc.
Archive Customer Account
Caution: Once a customer account has been Archived, no further edits can be made to the customer record and the archive can't be undone. This action should only be used on customers who were created in error and need to be removed from reporting data.
Add to High Risk
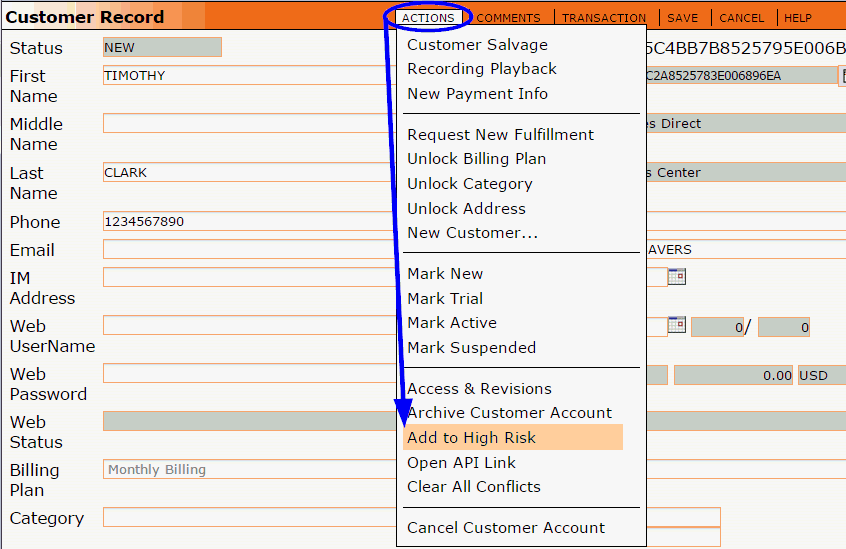
Adds the customer to the blacklist within OrangeCRM and places a HIGH RISK label at the top of the customer record. The customer must be in Canceled or Archived status.
Open API Link
If the customer record was created via API, this action will open the customer API token that was used at the time of creation.
Clear All Conflicts
Deletes all existing conflict records for the customer. Although rare, conflicts can occur when more than one user makes an edit to the same customer record at the same time. Since there can only be one version of the customer record and the system can't decide which of the edits to override, a duplicate customer record is temporarily created for each of the simultaneous edits. To resolve the conflicts, choose which of the customer records reflects the edits you want to keep, make any additional edits that may be needed and then click on Clear All Conflicts in the Actions menu to lock in the most recent edit and remove all other duplicate customer records that resulted from the conflict.
Cancel Customer Account
Changes the customer status to canceled. No further billings or fulfillments will be processed.
Comments Menu
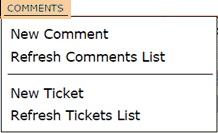
The comments menu on the customer record allows you to create new comments and new tickets in OrangeTask for this customer.
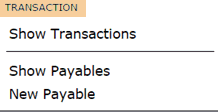
Transaction Menu
The transactions menu will show you a log of all processed and InQueue transactions associated with this customer. It will also show you all payables for this customer, as well as giving you the option to create a new payable for the customer. For more details, please see the Transactions topic.
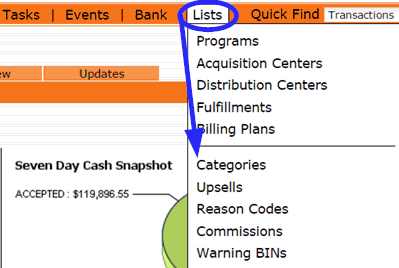
A Category is a custom named label that is assigned to a customer and can be used as a method of grouping data for reporting purposes and for determining such things as how a record is handled or when a fulfillment is generated (see Fulfillments for more information). Using categories is optional. Some businesses have a need for them and some don't.
Go to the Lists menu and click on Categories.
A list of all existing Categories will be displayed. To create a new Category click the New Category button in the top right corner.

A new Category window will open.

Description
Enter a brief descriptive name for the category.
Security (Optional)
Restricts the category to one single Program.
Notes
A detailed description of the purpose of this Category.
GUID
The unique number given to this category.
Status
The status of the category.
A Comment is a notation that is added to a customer record to document any interaction with a customer and/or any special actions that were taken. Utilizing comments in this way allows CSRs and managers to quickly and easily review the historical record of prior communication with the customer they are presently assisting.
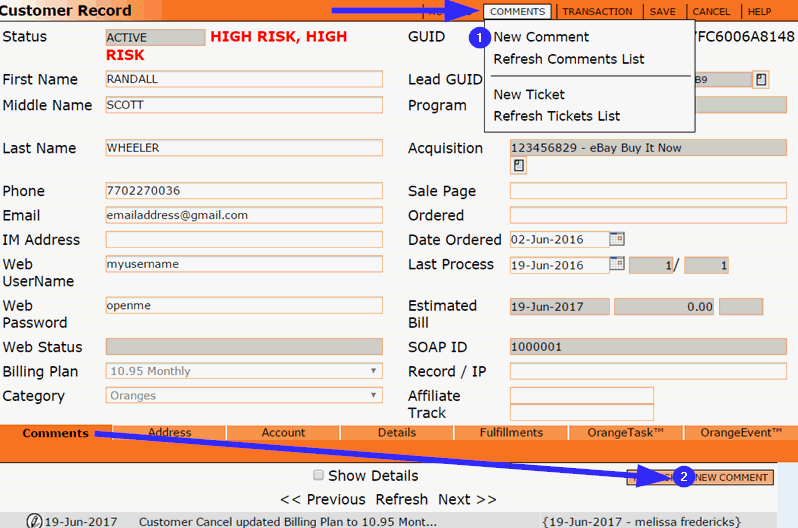
A new comment can be added to a customer record in one of two ways:
from the Comments menu, located beside the Actions menu, or
from within the Comments tab.
A new Comment form will open.
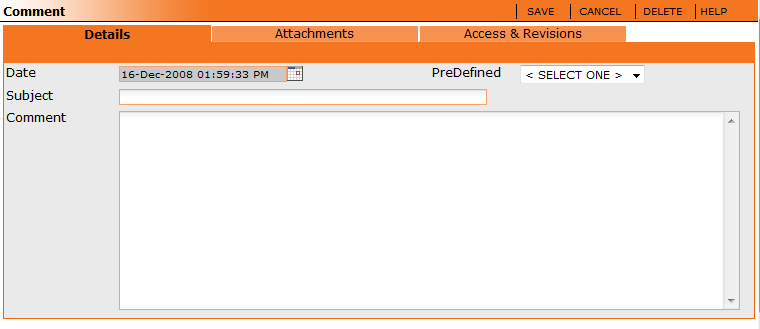
Date
The date and time the comment is created will automatically be filled in.
Subject
Enter a short description of the comment. The Subject Line is what is seen when viewing the list of existing comments, so it is good to keep it short and informative as to the nature of the comment.
Comment
This is where a detailed notation can be entered.
Predefined
If your system admin has set up Predefined Comments, you can use them as a time saving shortcut when entering frequently used comments. When a selection is made from the drop down menu, the subject and comment fields will be auto-filled with the default text assigned to the Predefined Comment you have selected. The default text can be changed as needed and additional text can also be added to it. See the section on this page titled How To Create a New Predefined Comment for more information.
Attachments Tab

The attachments tab allows you to attach any files to the comment: from voice recordings, to documents sent via email, etc. Once an attachment is uploaded, it will appear in the 'File Attachments' area.
Click the Save button to add your comment to the customer record.
Go to the Lists menu and click on Predefined Comments.
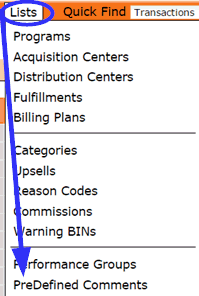
A list of all predefined comments will appear. You can edit any of these by double clicking them. To make a new one, click the New Comment button in the top right corner.

A new window will appear as seen below.
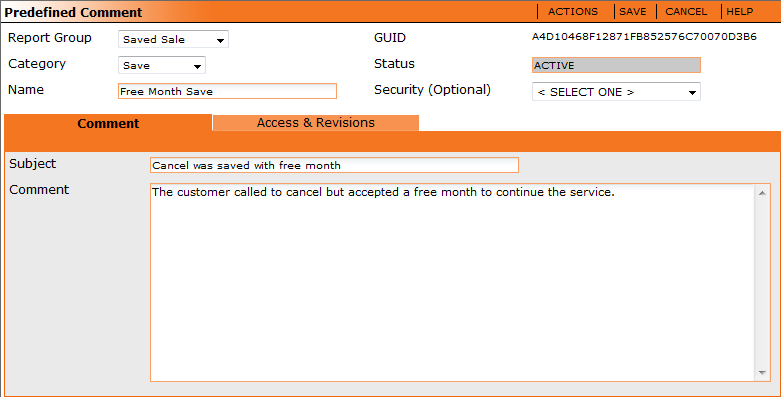
Report Group
Report Groups allow you to group together comments of certain type in reporting. Use the drop down menu to select a Report Group or create a new Report Group. It is possible to add as many report groups as you wish.
Category
Use the drop down menu to select one of the four comment categories: disposition, general, save or system. This is another method of further dividing report data.
Name
Enter a short descriptive name for the Predefined Comment, keeping in mind this is what CSRs will see listed when they are selecting a Predefined Comment.
Security (optional)
Restricts the Predefined Comment to one single Program.
Subject
Enter the default text to be auto-filled in the Subject Line when this Predefined Comment is selected by a CSR.
Comment
Enter the default text to be auto-filled in the Comment field when this Predefined Comment is selected by a CSR.
Click the Save button to add the Predefined Comment to the list.
Customer Fulfillments can be used for a variety of tasks including automated transmission of orders to your shipping center, sending emails to customers and sending multiple types of customer data files to internal business members.
Each Customer Fulfillment is generated from a Master Fulfillment Record, which is where the parameters & triggers for Customer Fulfillments are defined. See the Fulfillments section for further information on setting up Fulfillments.
A new Customer Fulfillment can be requested by going to the Actions menu on a Customer Record and clicking on Request New Fulfillment.

To see a historical list of all Fulfillments that have been issued to a customer, simply go to the Fulfillments tab on the Customer Record.

To view the details of a Fulfillment, click on the pencil icon. The Customer Fulfillment will open in a new window, as shown below.

Fulfillment
The name of the fulfillment.
Number
A number auto-assigned by OrangeCRM to this specific fulfillment.
Dist Center
The Distribution Center assigned to this fulfillment, if any. Not all fulfillments use a Distribution Center.
GUID
A unique 32 digit alpha-numeric string identifying the specific Customer Fulfillment record.
Requested
Date this fulfillment was requested, i.e. generated.
Batched
Date this fulfillment was batched, i.e. sent to the designated destination.
Actions Menu
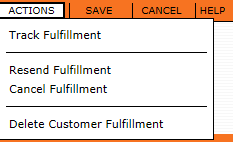
Depending on your level of access, you may not see all of the above options in the Customer Fulfillment Actions menu. If you need more permissions, please see your system administrator.
Track Fulfillment
If the tracking URL has been provided by your fulfillment center, this will open the URL in a new window.
Resend Fulfillment
Resubmits the same fulfillment to be sent to the customer again. You will see a new line item in the Fulfillments tab of the customer record.
Cancel Fulfillment
Stops the fulfillment from being processed, if it has not already been batched out.
Delete Customer Fulfillment
Deletes the fulfillment record from the Fufillments tab on the Customer Record.
Details Tab
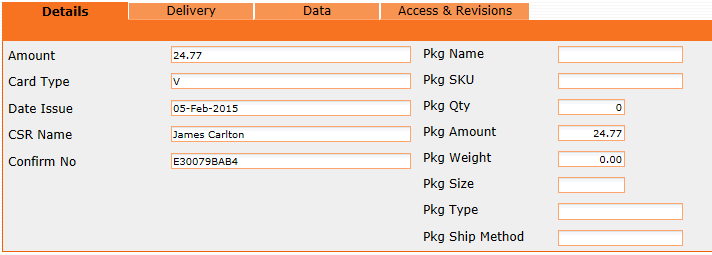
The fields in the Details tab will automatically populate with the values designated in the Custom Fields of the Fulfillment that you select. See Fulfillments.
Delivery Tab

The fields in the Delivery tab will be populated if and when your fulfillment center sends back a response file containing the tracking details of the Fulfillment. OrangeCRM's Fulfillment Response File Specifications can be downloaded from the Documentation Downloads page.
Data Tab
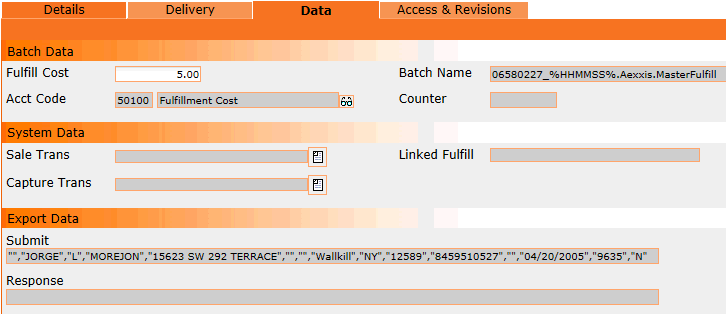
The fields in the Data tab will automatically populate once the Fulfillment has been batched.
Batch Data
Fulfill Cost - Cost assigned to this Fulfillment.
Acct Code - Account Code assigned to this Fulfillment.
Batch Name - Name of the Batch this Fulfillment was sent in.
Counter - A sequential number assigned by the system during the processing of the fulfillment.
System Data
Sale Trans - This field will only populate if the fulfillment was triggered by a Fee Schedule. Click on the paper icon to open the transaction linked to this Fulfillment.
Capture Trans - This field will only populate if the fulfillment was triggered by a Fee Schedule. Click on the paper icon to open the transaction linked to this Fulfillment.
Linked Fulfill - Displays the name of a fulfillment that cascades to or from this Fulfillment.
Export Data
Submit - Displays the string of data submitted in the Fulfillment Batch File.
Response - Displays the string of data received from your fulfillment center in the Fulfillment Response File.
You can create a blacklist in OrangeCRM to block the creation of a new customer record based on a Bank BIN, customer billing details and/or customer contact details. The blacklist feature can be used to prevent future fraudulent credit card purchases, to prevent the use of prepaid cards for recurring transactions (which may only carry a balance to cover the first transaction) and in cases of a data breach against a particular credit card issuer compromising many of their card holders, a BIN number can be used to block potentially bad orders coming from these cards.
Viewing Current High Risk Customers
To view a list of all current High Risk Customers, go to the Customers menu and click on High Risk (BlackList).
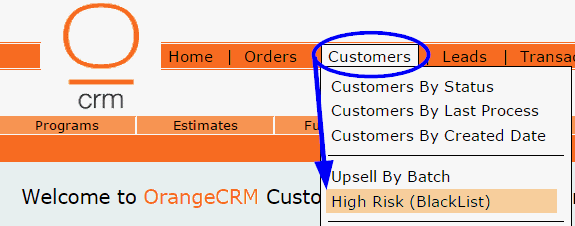
A list of all active High Risk Customers will be displayed.

To view or edit a High Risk Customer record, click on the pencil icon beside it.
Creating New High Risk Customers
High Risk Customers can be created in several ways, all of which are covered below.
Creating a High Risk Customer From a ChargeBack Transaction
The simple action of marking a transaction as a Chargeback will cause the CRM to automatically create a new High Risk Customer record containing all of the customer's billing and contact details. No further action is required.
Creating a High Risk Customer From a Customer Record
Creating a High Risk Customer directly from a Customer record will auto-populate all of the billing and contact details from the Customer record into a new High Risk Customer record.
To create a High Risk Customer from a Customer record, go to the Actions menu and click on Add to High Risk.
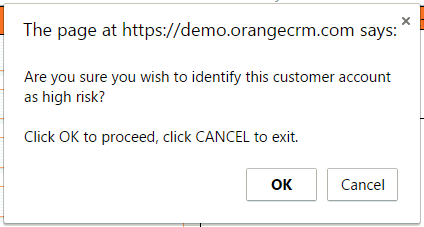
A confirmation box will pop up. Click OK to proceed.
The Customer record will auto-refresh and you should see a new note in the Comments tab stating that this customer account has been marked as a high risk.
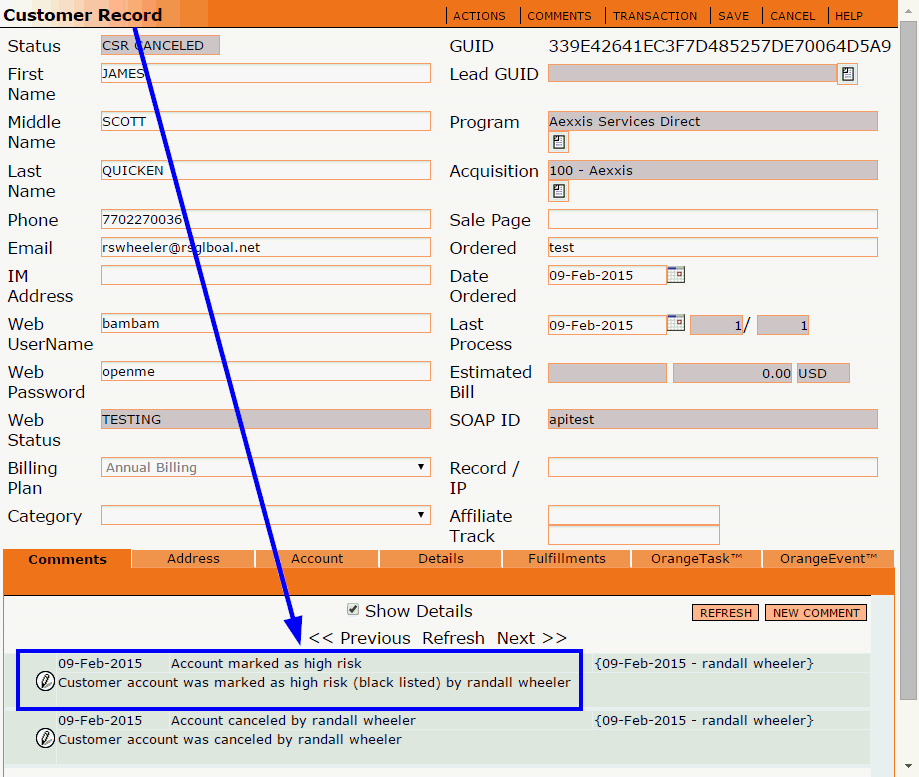
Save the customer record when you are done.
Creating a High Risk Customer From Scratch
If you are not creating a High Risk Customer from a chargeback transaction or directly from a Customer record, both of which auto-populate all of the customer's billing and contact details, you must create a High Risk Customer from scratch.
To create a High Risk Customer from scratch, go to the Customers menu and click on High Risk (BlackList).

A list of all active High Risk Customers will be displayed. Click on the New Customer button in the upper right corner.

A new High Risk Customer record will open.
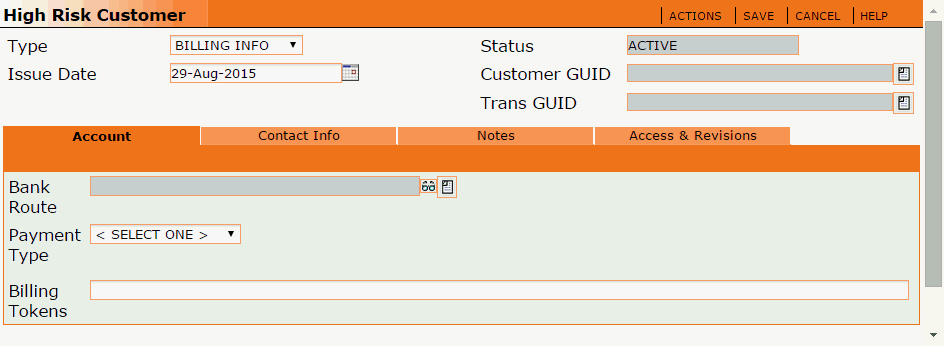
Type
Select one of the following High Risk Customer Types:
Issue Date
The date the High Risk Customer is created.
Customer GUID and Trans GUID
These fields are auto-populated when a High Risk Customer is created from a customer record or a chargeback transaction. When these fields are populated, you can click on the paper icon beside them as a shortcut to open and view the customer/transaction record.
The information that you will need to enter in the various tabs within the High Risk Customer record will depend on the selection you made in the Type field. Please proceed with the set of directions listed below that matches the Type of High Risk Customer you are creating.
High Risk Customer Type: Bank BIN

In the Account tab of the High Risk Customer record, fill in the following fields:
BIN
Enter the bank BIN number.
Card Type
Select the type of credit card the BIN number is assigned to.
Description
Enter the name of the bank that issued the credit card assigned to the BIN number.
Click the Save button when you are done.
High Risk Customer Type: Billing Info
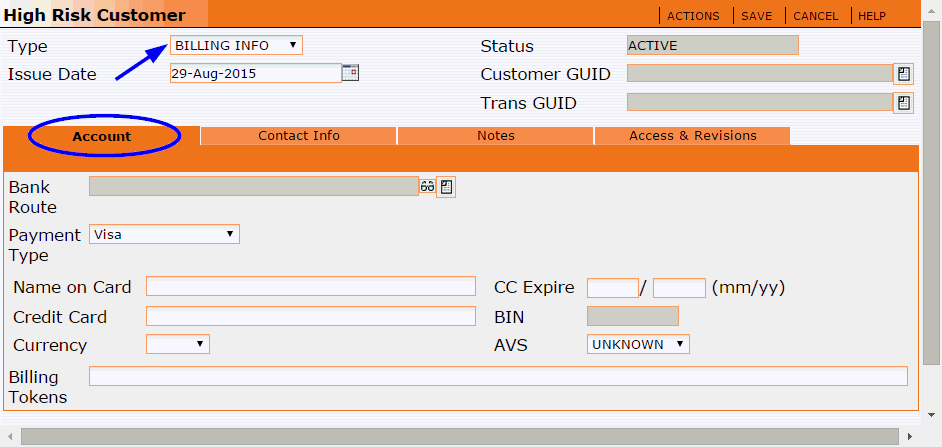
In the Account tab of the High Risk Customer record, select the Payment Type you want to block and fill in the payment detail fields below that.
Click the Save button when you are done.
High Risk Customer Type: Contact Info
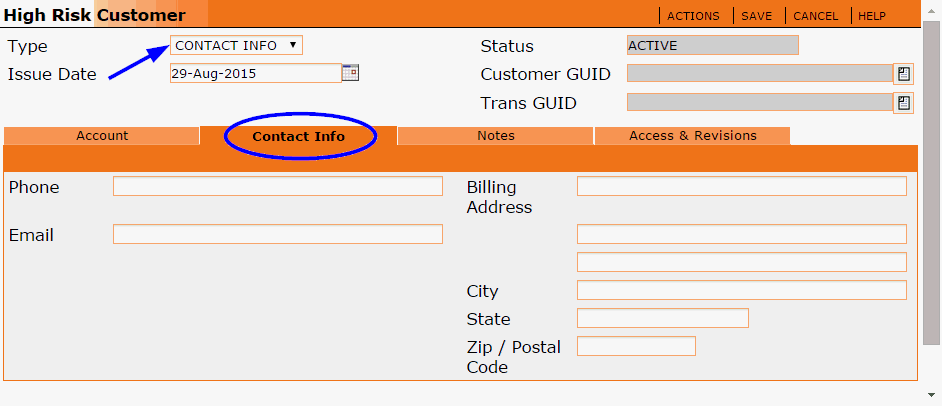
In the Contact Info tab of the High Risk Customer record, fill in one or more of the following fields:
Phone
Enter the phone number associated with the customer you want to block.
Enter the email address associated with the customer you want to block.
Billing Address
Enter the billing address associated with the customer you want to block.
Click the Save button when you are done.
Creating High Risk Customers From a BIN List
You can create multiple High Risk Customers simultaneously from a BIN List.
To load a BIN List, go to the Customers menu and click on High Risk (BlackList).

A list of all active High Risk Customers will be displayed. Click on the Load Bins button in the upper right corner.

The High Risk BIN Load window will open.
Simply copy and paste your list of BIN numbers into the BINs to Load field. The required format is one BIN per line, with no commas, as shown in the example below.
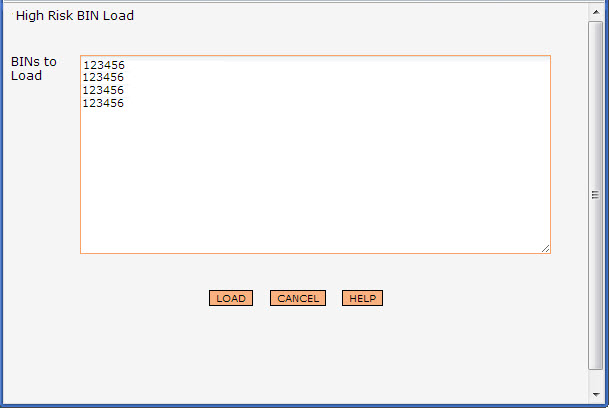
Click the Load button to load the BIN list. OrangeCRM will then process the BIN list and create a new High Risk Customer for each unique BIN in the list. A confirmation box will pop up with the results, as shown below.
