

Orders In OrangeSOAP
 Click one of the links listed above
to jump to a section on this page.
OrangeSOAP is an order processing module that allows agents to instantly create and bill new customers directly in OrangeCRM using a predefined offer. SOAP stands for Sales Order & Acquisition Processing. Features of OrangeSOAP include real-time banking, multiple fulfillments, multiple upsells, revenue shares and a host of reports. This is a great order entry tool that can be used by your sales and customer service staff, mail-order processing department and the like.
User security roles can be limited to just the order entry feature, to restrict access to other areas in the CRM. The minimum required security roles for order entry are: MenuSOAP and the security role of each program you want the user to be able to enter orders into, or SeeAll to allow order entry in all programs.
 The SOAPAccess role doesn’t
necessarily need to be added to users, as it only controls whether or
not your CRM as a whole can access the OrangeSOAP module. The SOAPAccess
role just needs to be in Active status in your CRM (Home menu >Role
Security).
Once the OrangeSOAP module has been installed in your OrangeCRM database and the SOAPAccess role is Active, the Orders menu will be visible to users who have the MenuSOAP role.
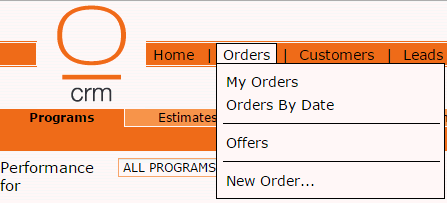
 Before
any orders can be entered, the CRM administrator must first create the
offers that will be sold to customers.
Go to the Orders menu and click on Offers.
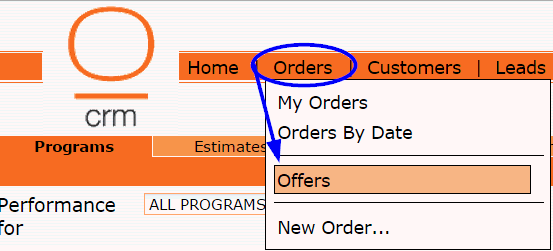
A list of any existing offers will be displayed.

To create a new offer click on the Add Offer button in the upper right corner.
A new window will open for the Offer.

Name
This is an important field. It is used to identify the Offer and will be referenced in other places throughout the CRM, including the order form and reports. Therefore, make sure you choose a name that is descriptive, clearly differentiates this offer from other offers and identifies which program it will be assigned to. Example: Program A - 1.95 30DayTrial 14.95 Monthly. Offer names can always be changed in the future, if need be.
Important: Each Offer, across all Programs, should have a unique name. Offers with an identical name can easily be confused in reporting and other areas in the CRM, even if they are assigned to different programs.
Program
Select the Program this Offer will be assigned to.
Performance Tab
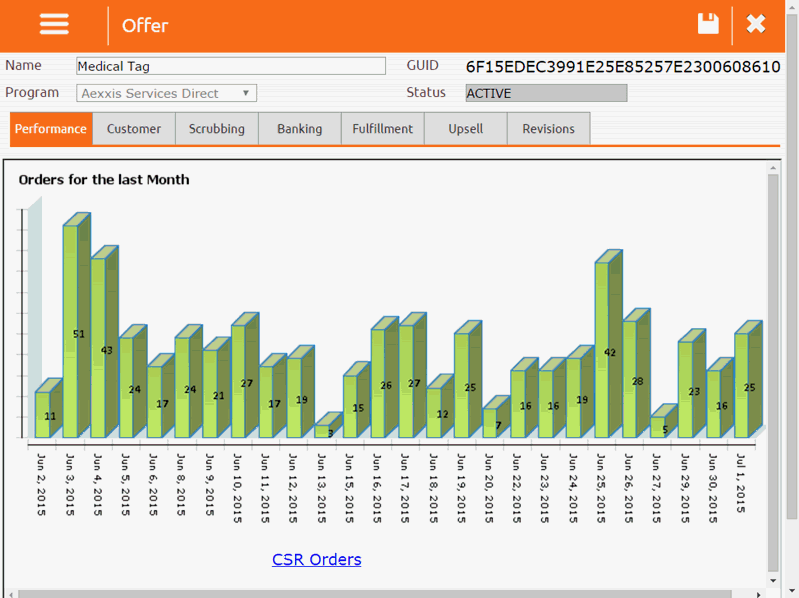
The Performance tab contains a bar graph displaying a daily total of the number of orders entered for this Offer in the last month. Below that is a hyperlink to the CSR Orders report, which will give you more details.
Customer Tab
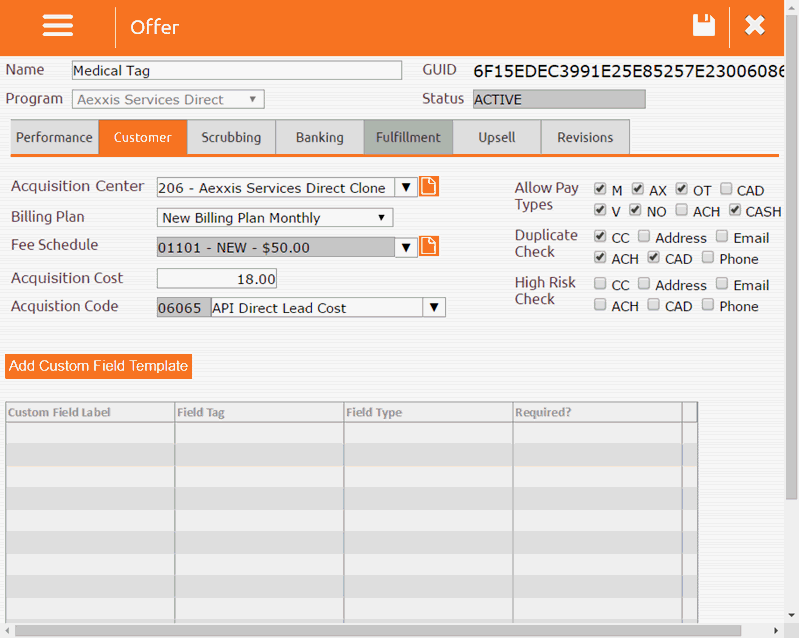
Select the Acquisition Center, Billing Plan and Fee Schedule to be assigned to this offer.
Enter the Acquistion Cost and select the appropriate Acquisition Code.
Select the Pay Types allowed for this offer.
Select the fields you wish to enable Duplicate Check on. This feature checks for existing customers that already have the same value as the new customer in the selected field. If a duplicate is found, a new customer record won't be created. We recommend enabling Duplicate Check on continuity offers to prevent repeated orders, which may be fraudulent. If you don't want to use the Duplicate Check feature, leave all boxes unchecked.
Select the fields you wish to enable High Risk Check on. This feature checks the value in the selected fields against your black list of customers who have been marked as a High Risk. If a match is found, a new customer record won't be created. If you don't want to use the High Risk Check feature, leave all boxes unchecked.
 Leaving
the high risk options unchecked will allow blacklisted customers to place
future orders.
Custom Field Templates are used only when you need to record specific order details for which there is not already an existing field on the order form. This feature allows you to create an unlimited number of custom fields that will appear in tab #4 of the order form. Custom fields and their values will automatically be transferred from the order form to the details tab of the customer record, where they can be referenced, edited and used in fulfillments.
 Before
creating a new custom field, please be sure to check all
tabs in the order form to make sure that field doesn't already
exist. Duplicate fields will cause conflicts within the CRM, which will
result in errors.
If you do not need to create any custom fields for this offer, proceed to the Scrubbing Tab.
To create a custom field for this offer, click the Add Custom Field Template button, located in the Customer Tab of the Offer.
A box will pop up where you will enter the details for the custom field.
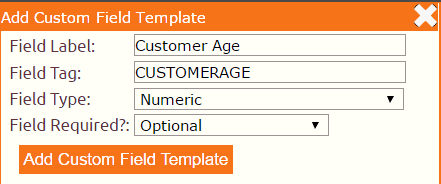
Field Label is where you enter the custom name you want to assign to this field. This is the field name that will appear on the order form and on the customer record.
Field Tag is auto-populated by the CRM and should be left alone. This is what will allow you to include the custom field in a fulfillment.
Field Type can be text, date, numeric or currency. Choose the appropriate option from the drop down menu.
Field Required is where you dictate whether this custom field is optional or required. If a required field is left blank, the order will not be allowed to be processed. A pop up message will direct the agent to fill in the required field(s).
When you are done, click the Add Custom Field Template button. You should now see the newly created field listed at the bottom of the Customer Tab.
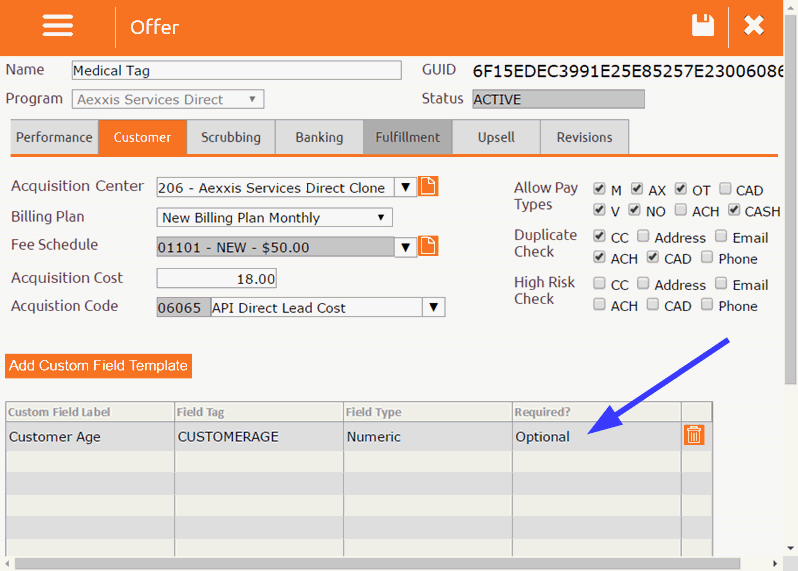
Repeat the above steps for any additional custom fields that are needed on this offer. When you are done, proceed to the Scrubbing Tab.
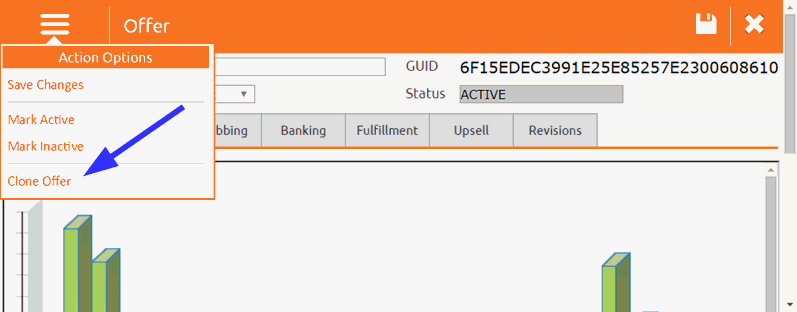
 Time-Saving Shortcut: If you need
to create multiple offers that require the same set of custom fields,
use the Clone Offer feature located
in the Offer Menu. This eliminates
the need to repeatedly add the same custom fields one-by-one on each offer.
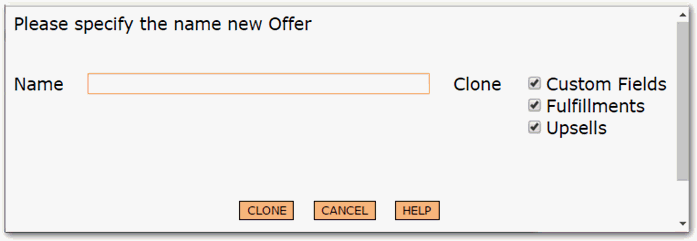
A box will pop up where you will enter the name of the new offer and select what you want to be cloned from the existing offer.
 The
Clone Offer feature can only be used on offers within the same program.
This means that you can't clone an offer from one program to another program.
Scrubbing Tab
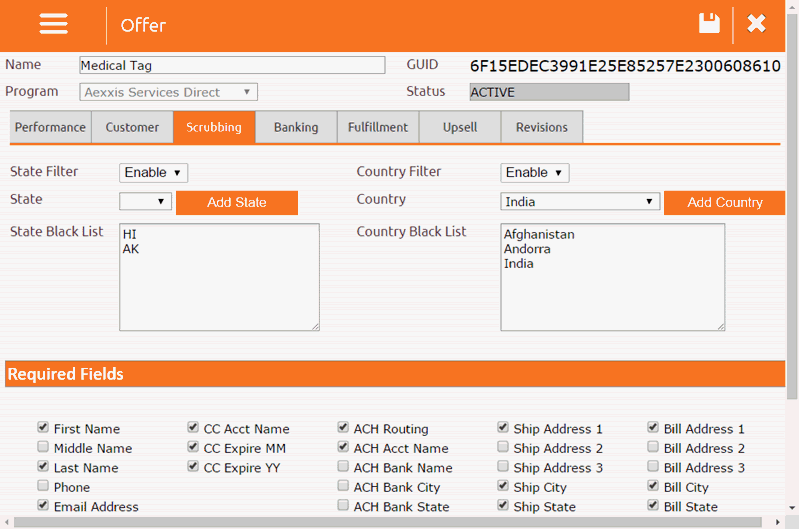
The State Filter and Country Filter allow you to black list specific states and/or countries. Orders with a state or country on the black list will not be allowed to be processed.
If you wish to use either one of these filters, you must select Enable from the drop down menu. Then select a state/country and click the Add button. Each selection will be added to the black list displayed below the drop down menu.
Select all of the Required Fields that are necessary for a new customer record to be created. Orders that are missing one of the required fields will not be allowed to be processed.
Proceed to the Banking Tab.
Banking Tab
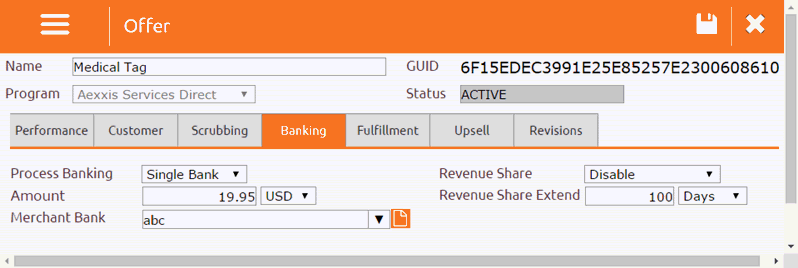
Select the Process Banking option you want to use for this offer.
Enter the dollar Amount to be processed on the initial transaction. If you are not using real time banking for this offer, leave the Amount field blank.
 The dollar amount you enter in the Banking
tab will override the amount on the Fee Schedule selected in the Customer
tab.
 You can use the real time banking feature to perform a preauth
with capture delay. To do this you must set the capture delay on the Fee
Schedule and select that Fee Schedule in the Customer tab of the offer.
Enter the dollar amount of the preauth in the Banking Tab.
Select the Merchant Bank to be used for all transactions with this offer. If you are using the Load Balance option, transactions will automatically round robin through each of the banks assigned to the Acquisition Center selected in the Customer tab.
To enable Revenue Share for this offer, select Current User or the name of the agent to assign the Revenue Share to.
Enter the number of days or months for the Revenue Share.
Then go to the Fulfillment Tab.
Fulfillment Tab
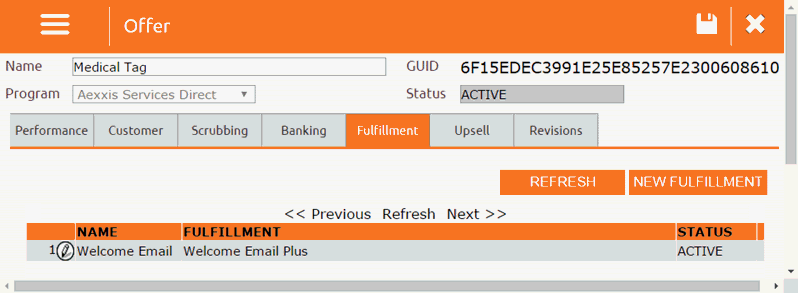
Click on the New Fulfillment button in the upper right corner to add a fulfillment to this offer.
A new window will open for the Offer Fulfillment.
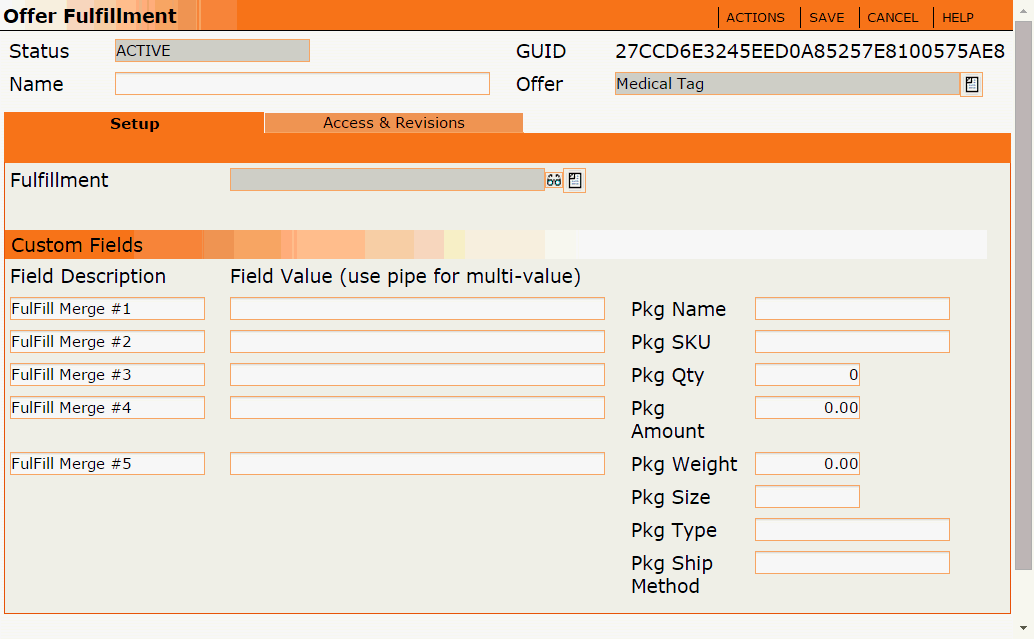
Enter a meaningful Name for this Offer Fulfillment.
In the Setup tab, select the Fulfillment you wish to add to this offer.
Add any Custom Fields that may be required for the fulfillment, if any.
Fill in the Pkg fields to the right of the custom fields.
Then click Save.
You should now see the Fulfillment listed in the Fulfillment tab of the offer.

Repeat the above steps to add more fulfillments to this offer. Then go to the Upsell tab if your offer includes an upsell.
 Time-Saving Shortcut: If you need
to create multiple offers that require the same set of fulfillments, use
the Clone Offer feature located
in the Offer Menu. This eliminates
the need to repeatedly add the same custom fields one-by-one on each offer.

A box will pop up where you will enter the name of the new offer and select what you want to be cloned from the existing offer.

 The
Clone Offer feature can only be used on offers within the same program.
This means that you can't clone an offer from one program to another program.
Upsell Tab
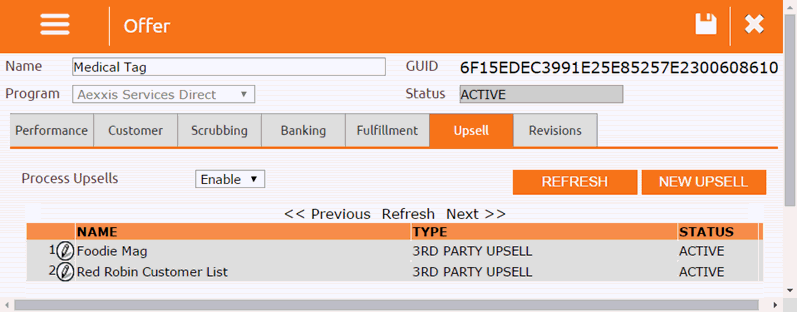
If the offer includes an upsell, click on the New Upsell button in the upper right corner to add an upsell to this offer.
A new window will open for the Offer Upsell.
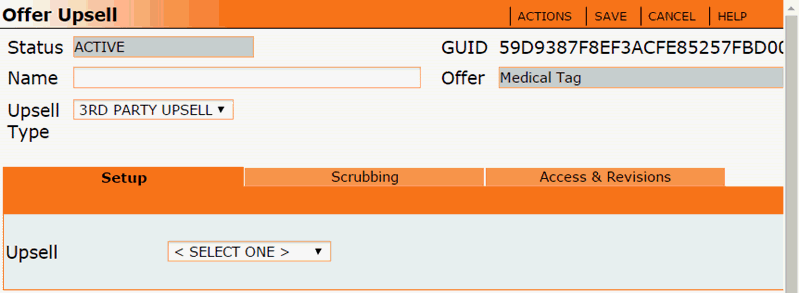
Enter a meaningful Name for the upsell.
Select the appropriate Upsell Type.
In the Setup Tab, select the Upsell from the drop down list.
If you need to add a state and/or country black list to this upsell, go to the Scrubbing Tab.
Then click the Save button in the upper right corner of the window.
You should now see the newly created Upsell listed in the Upsell Tab of the Offer.

Repeat the above steps to add more Upsells to this offer.
 If
you have multiple order configurations/packages with different types of
upsells, a separate Offer will need to be created for each configuration.
This helps ensure accuracy in order entry.
 Time-Saving Shortcut: If you need
to create multiple offers that require the same set of upsells, use the
Clone Offer feature located in
the Offer Menu. This eliminates
the need to repeatedly add the same custom fields one-by-one on each offer.

A box will pop up where you will enter the name of the new offer and select what you want to be cloned from the existing offer.

 The
Clone Offer feature can only be used on offers within the same program.
This means that you can't clone an offer from one program to another program.
Once you have finished configuring each of the tabs in the Offer window, be sure to Save your changes.
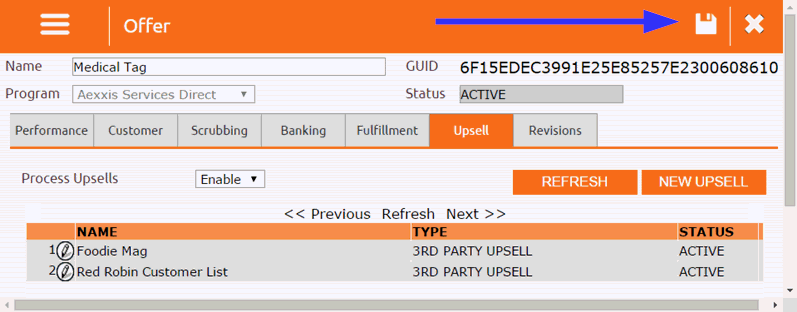
You should now see the new offer listed in the Offers list.

On the home page, go to the Orders menu and click on New order.
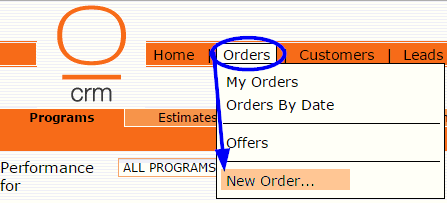
A new window will open for the New Order.
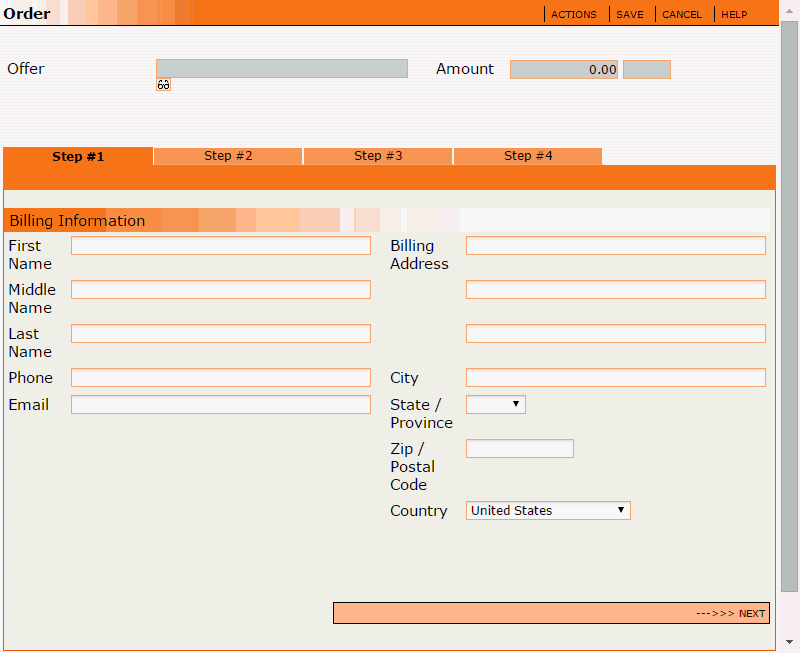
Select the Offer the customer is ordering.
The Amount will automatically populate once an Offer has been selected.
Go to the Step #1 tab.
Enter all of the customer's Billing Information.
Then click the Next button to move on to the Step #2 tab.
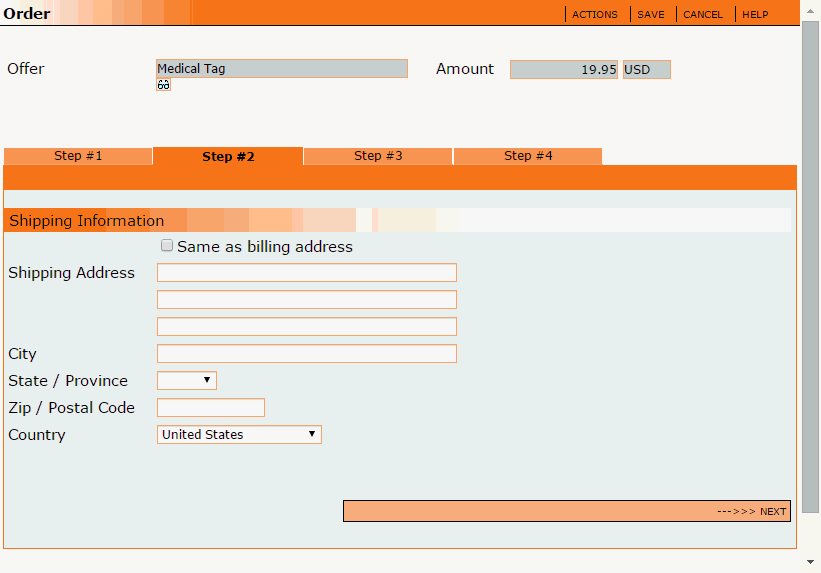
In the Step #2 tab, enter all of the customer's Shipping Information.
Then click the Next button to move on to the Step #3 tab.
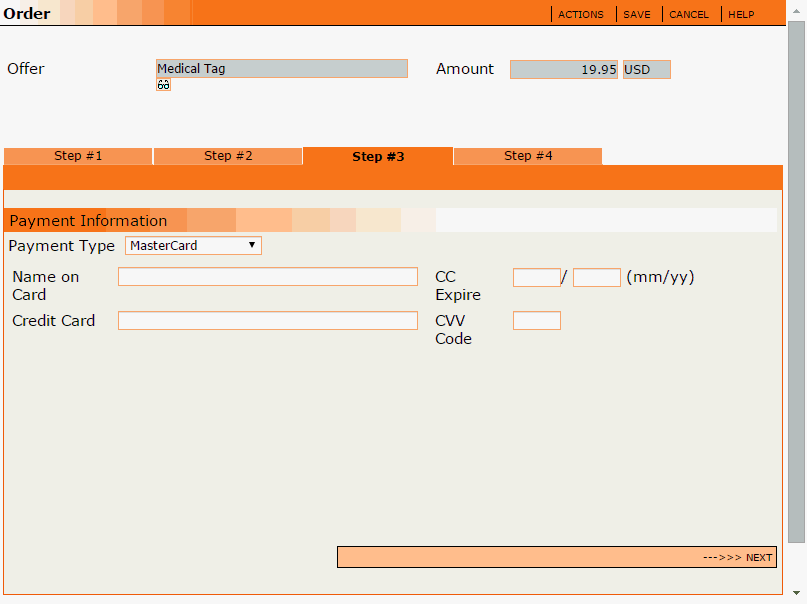
In the Step #3 tab, enter the customer's Payment Information.
Then click the Next button to move on to the Step #4 tab.
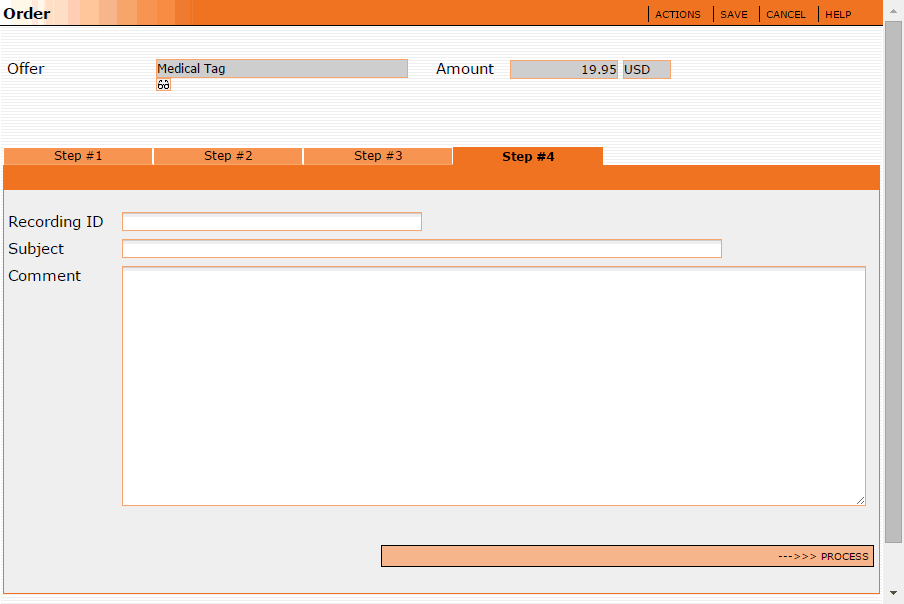
In the Step #4 tab, enter the Recording ID (if any). This is optional.
If you wish to add a comment to the customer record, fill in the Subject and Comment fields (optional).
To process the order, click on the Process button.
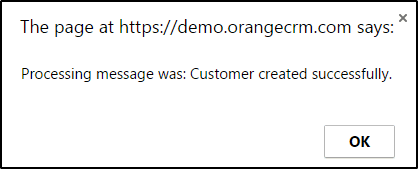
Once the Order has successfully processed, a message will be displayed indicating that a Customer record has been created.
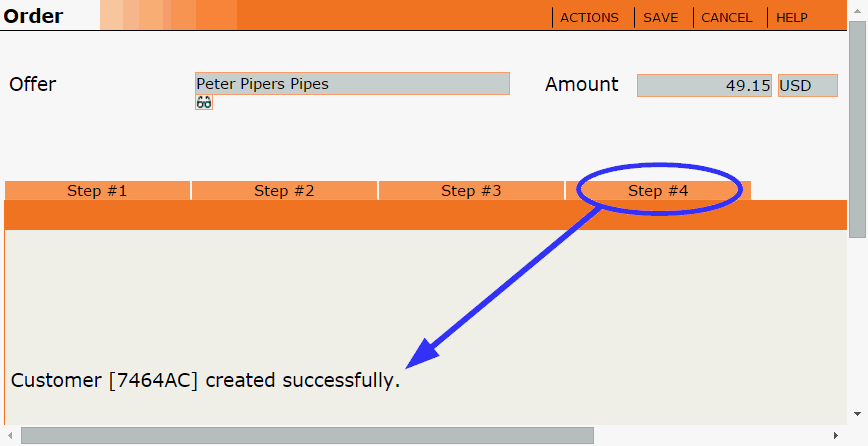
The number displayed in square brackets is the last 6 characters of the customer GUID, which can be provided to the customer as an order ID/order confirmation number. The same number can also be used to locate the customer record in the future.
 Please
note there are a couple of things agents need to know when using the last
6 characters of the customer GUID to find a customer record:
To verify that an order was created successfully, go to the Orders menu on the home page and click on My Orders.
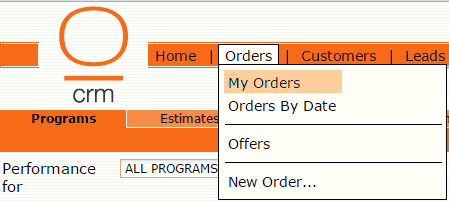
If the Order was not created successfully, it will be in Error status. Otherwise, the order status will be Success.

OrangeSOAP Orders can be viewed in one of two ways. Both options are explained below.
Viewing Orders By Agent
To view your orders or orders by agent, go to the Orders menu and click on My Orders.

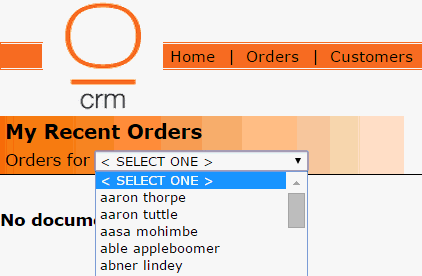
If you are a CSR, your orders will automatically be displayed on the My Recent Orders page. If you have not created any Orders, it will say that no documents were found.

If you are a manager or CRM administrator who has special access to view orders for any agent, you will have the ability to select a user name from the drop down selector in the upper left corner to view a list of orders created by that agent.
Viewing Orders By Date
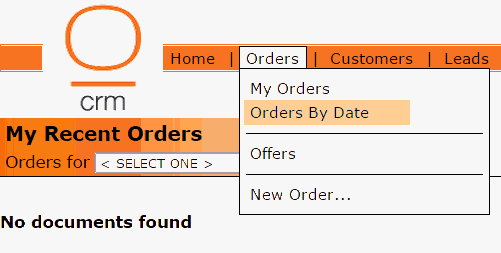
To view Orders by date, go to the Orders menu and click on Orders By Date.
Click on the calendar icon to select a date.
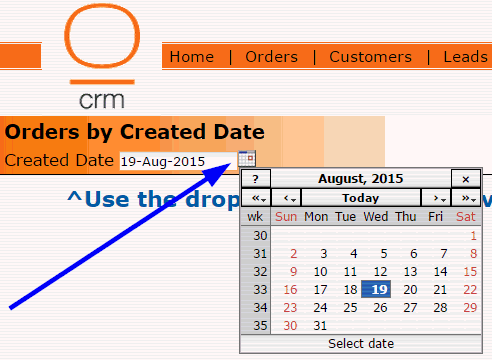
The Orders By Created Date page should automatically refresh and display the orders created on the selected date.

To open and view an Order record, click on the pencil icon beside it.

Offer
The name of the Offer this customer ordered.
Amount
The dollar amount of the Offer this customer ordered.
Actions Menu

New Order
Opens a blank order form for a new Order to be created.
Retry Order
Resends a Declined or Error Order to the bank for another billing attempt.
Access & Revisions
Displays a historical list of all edits made to the Order record.
Display Message
Shows you the processing message that was received when the order was submitted, indicating whether it was approved or declined.
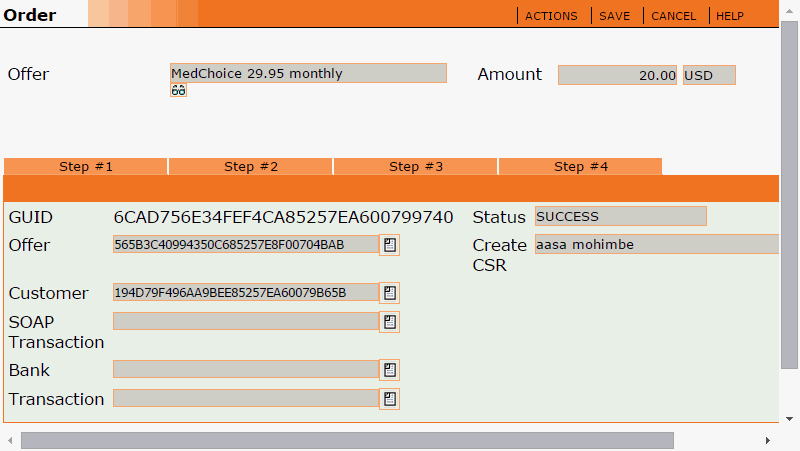
System Data
Displays the Order GUID, Order Status, CSR who created the Order, and shortcut links (the small paper icons) to the associated Offer record, Customer record, SOAP Transaction (created via the API), Bank record and Transaction record (created within OrangeCRM).
 Only
managers and CRM administrators who have special permissions will have
access to the System Data option in the Actions menu.
Tab #1
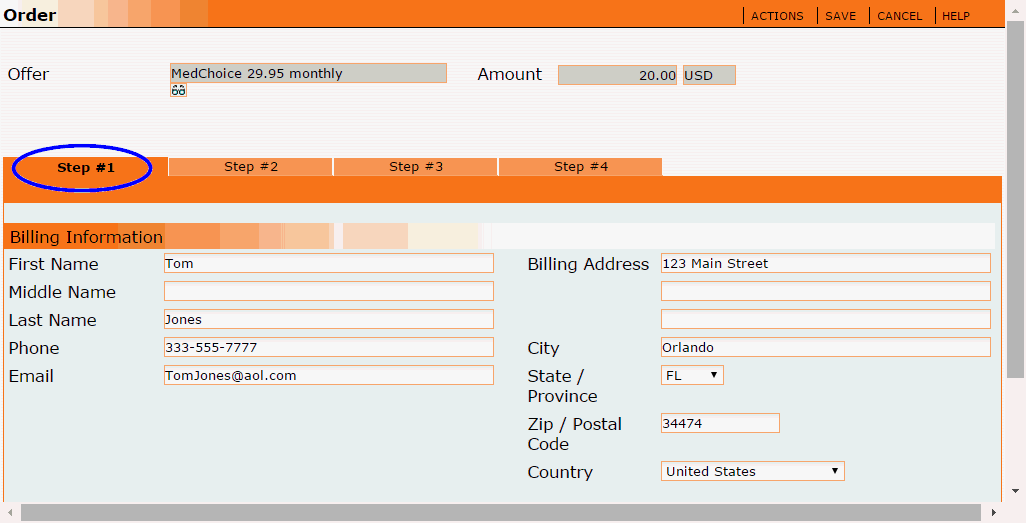
Billing Information
The customer's name, phone, email and billing address.
Tab #2
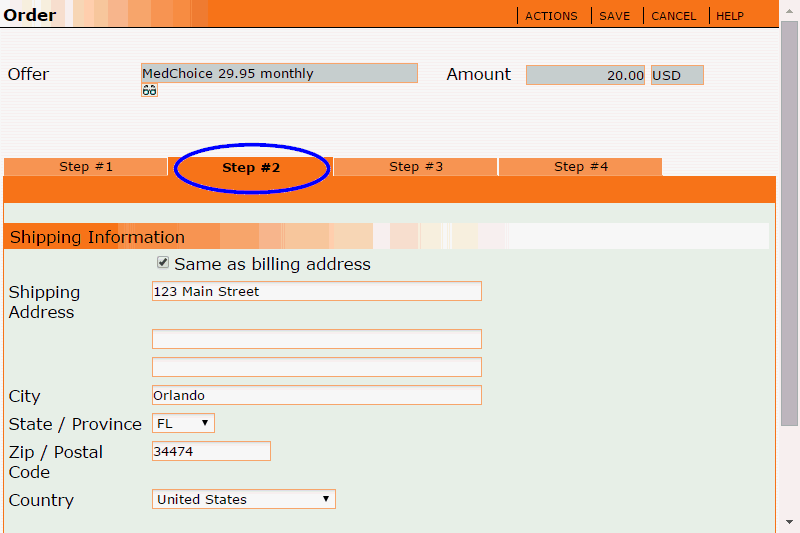
Shipping Information
The customer's shipping address.
Tab #3
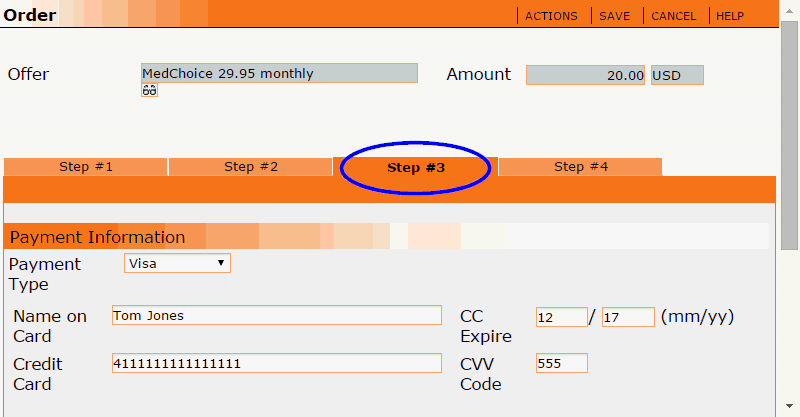
Payment Information
The customer's Payment details.
Tab #4
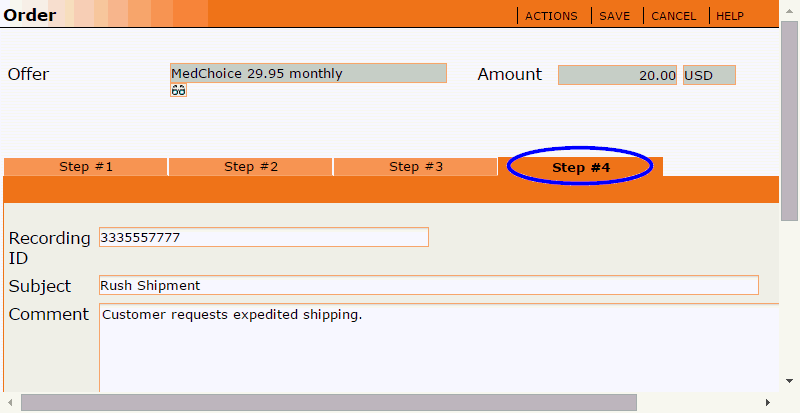
All of the fields in tab #4 are optional.
Recording ID
The Recording ID that was entered at the time the order was created.
Subject
The subject of the Comment that was entered at the time the order was created.
Comment
The notations that were entered at the time the order was created.