OrangeCRM Basics
In this Topic: Hide
 Click one of the links listed above to jump to a section on this page.
Security settings within Apple Safari must be configured prior to the first use of an OrangeCRM installation to ensure full access to all of the CRM's enhanced features.
Configuration and setup steps are outlined for Apple Safari in this section. Please see: http://support.apple.com/kb/HT1677 for more information on Safari security settings.
Note: OrangeCRM requires Apple Safari 5 or higher. Please ensure that you have the latest version installed. To download Safari go to: http://www.apple.com/safari/download/.
Select the Security Icon

Keeping password-protected web sites secret
When you enter a user name and password for a web site, Safari asks if you want to save the information. You may want to keep your password, as well as your visit to that web site, secret.
To prevent Safari from saving your information:
Note: We recommend that you never store passwords and that you update or change them frequently for security reasons.
Phishing is the practice of masquerading as a legitimate organization, such as an Internet service provider (ISP), bank, or online auction site, in order to acquire sensitive information including user names, passwords, and credit card numbers.
Typically, phishing is carried out by an email or instant message directing you to enter your sensitive information at a fake web site that appears nearly identical to a legitimate one.
Safari helps to protect you from fraudulent Internet sites.
When you visit a suspicious site, Safari warns you and prevents the page from loading. To take advantage of this protection, be sure to keep the "Warn when visiting a fraudulent web site" check box selected in the Security pane of Safari preferences.
Security settings within Google Chrome must be configured prior to the first use of an OrangeCRM installation to ensure full access to all of the CRM's enhanced features.
Configuration and setup steps are outlined for Google Chrome in this section. Please see: https://support.google.com/chrome/?hl=en&p=wrench for information on its security settings.
Note: OrangeCRM requires Google Chrome 15.x www.google.com or higher. Please ensure that you have the latest version installed. To download Chrome go to: https://www.google.com/chrome/?hl=en&brand=chmo.

Note: We recommend that you never store passwords and that you update or change them frequently for security reasons. You can manage your personal password setting in the screen below.
To change other Google Chrome security settings, go to the Setting tab on the Wrench tool drop down box.
Managing pop-ups:
Google Chrome prevents pop-ups from automatically appearing and cluttering your screen. Whenever the browser blocks pop-ups for a site, the icon appears in the address bar. Click the icon to see the pop-ups that have been blocked or to manage pop-up settings for the site.
To see pop-ups for a specific site
To see blocked pop-ups for a site, follow the steps listed below:
If pop-ups have been blocked, you'll see the icon in the address bar. Click the icon to see a list of the blocked pop-ups.
Click the link for the pop-up window that you'd like to see.
To always see pop-ups for the site, select "Always show pop-ups from [site]." The site will be added to the exceptions list, which you can manage in the Content Settings dialog.
To manually allow pop-ups from a site, follow the steps below:
Click the wrench icon on the browser toolbar.
Select Settings.
Click the Under the Hood tab.
Click Content settings in the "Privacy" section.
In the "Pop-ups" section, click Manage exceptions.
Allow all pop-ups

You can allow all pop-ups by disabling the pop-up blocker. This is the recommended setting. Follow these steps:
Click the wrench icon on the browser toolbar.
Select Settings.
Click the Under the Hood tab.
Click Content settings in the "Privacy" section.
In the "Pop-ups" section, select "Allow all sites to show pop-ups." Customize permissions for specific web sites by clicking Manage exceptions.
In the Hostname Pattern field, type in http://www.orangecrm.com and then click on the enter. Now, Orangecrm.com has be added to the pop-up exceptions list.
Adjust images, JavaScript, and other web content settings:
Use the Content Settings dialog to manage the following settings: cookies, images, JavaScript, plug-ins, pop-ups, location sharing, and notifications. Follow the steps below to adjust these settings:
Cookies are files created by web sites you've visited to store browsing information, such as your site preferences or profile information. They're allowed by default. It's important to be aware of your cookie settings because cookies can allow sites to track your navigation during your visit to those sites. Learn more about managing cookies
Images are allowed by default. To prevent images from displaying, select "Do not show any images."
JavaScript is commonly used by web developers to make their sites more interactive. If you choose to disable JavaScript, you may find that some sites don't work properly.
Security settings within Internet Explorer and Mozilla Firefox must be configured prior to the first use of an OrangeCRM installation to ensure full access to all of the CRM's enhanced features.
Configuration and setup steps are outlined for Internet Explorer in this section. Please see: http://windows.microsoft.com/en-US/internet-explorer/help for information on its security settings.
Note: OrangeCRM requires Internet Explorer version 8 or higher. Please ensure that you have the latest version installed. To download Internet Explorer go to: http://windows.microsoft.com/en-US/internet-explorer/downloads/ie.
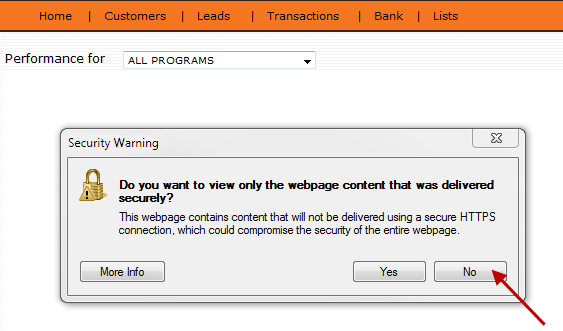
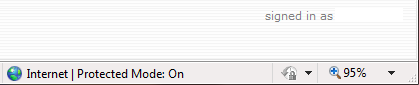
You will also see the following information on the menu bar on the lower right-hand on your screen:
You need to select No to the above Security Warning in order to change the security settings for OrangeCRM on a permanent basis.
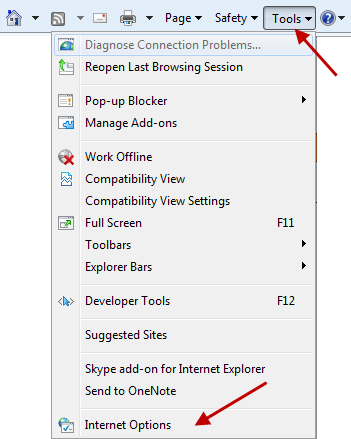
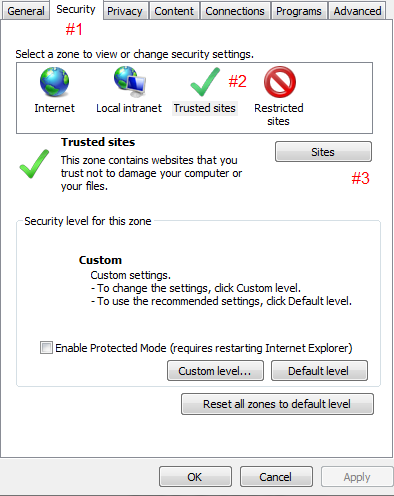
On the top right menu bar choose Tools and then Internet Options as shown below:
Choose Security (#1): Trusted Sites (#2): and then the Sites tab (#3) as shown below:
After clicking on the Sites tab the following box will appear:
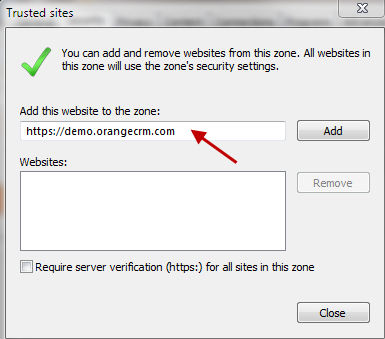
In the Add this website to the zone: field type *.orangecrm.com and then click on the Add tab. *.orangecrm.com will be added to the Websites: box. Also ensure that the box next to the statement, Require server verification (https:) for all sites in this zone, is unchecked. These changes are noted below.
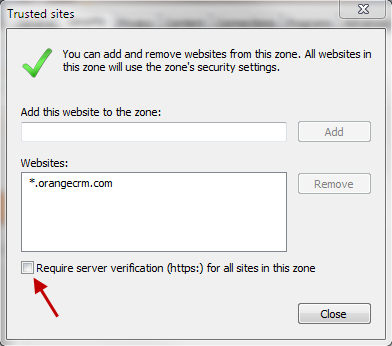
Click on the Close tab.
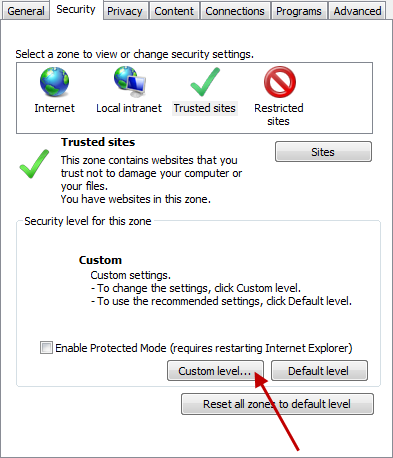
You will be returned to the main Security tab box. In the center is a box titled Security level for this zone. Click on the Custom level... tab as shown below:
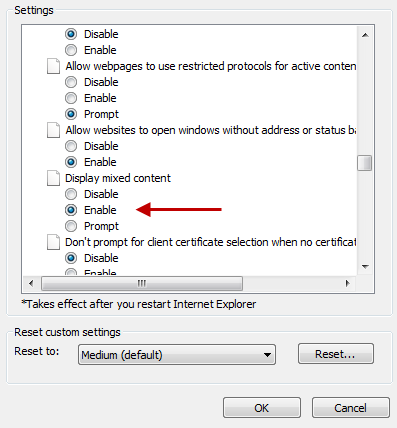
Scroll down about halfway in the Setting box to Miscellaneous: Display mixed content and click on the Enable button; click on OK to accept the changes.
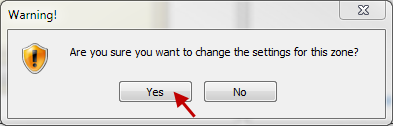
Click on the Yes tab to change the settings for this zone.
And then click on OK to accept the changes to the Security options. You will note that the information regarding security has changed on the lower right-hand bar on the home page to the following:

Note: We recommend that you never store passwords and that you update or change them frequently for security reasons.
Security settings within Mozilla Firefox must be configured prior to the first use of an OrangeCRM installation to ensure full access to all of the CRM's enhanced features.
Information for the security settings for Mozilla Firefox are outlined in this section. Please see: http://support.mozilla.org/en-US/kb/private-browsing-cookies-and-history for more information on Firefox security settings.
Note: OrangeCRM requires Mozilla Firefox version 3.6 or higher. Please ensure that you have the latest version installed. To download Firefox go to: http://www.mozilla.org/en-US/firefox/new/.
To access Firefox Security settings go to the Options tab as seen below.
The Options window will appear.
To Manage Pop-Ups
To manage pop-ups, simply click on the exceptions tab and enter your OrangeCRM URL and allow it. Or uncheck the Block pop-up window which will allow for all pop-ups to be seen.
Enable Mixed Security content
If you have previously used Firefox for viewing web pages you have probably enabled mixed content security viewing. To check the security levels on OrangeCRM, you will note a small padlock on the lower right hand menu bar of the screen. There will be a small circular red button with an exclamation point in the center. If you hover over that red button, you will see the following message:
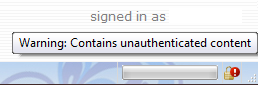
Click once on the red button and the following box will appear:

You will notice that both the warning and technical details on the above box mention that there is unauthorized content or partially encrypted information on this web site. OrangeCRM uses third-party Adobe graph and chart software to build reports. These charts are not encrypted resulting in the flagged message. Please be assured that your personal data is encrypted and fully secure.
When you log into OrangeCRM, you will be logged in for as long as your web browser remains open. If you want to keep your browser open when leaving your workstation, please remember to apply your local company security policies, such as password screen savers, to prevent unauthorized access to this or any other applications.
To log in to OrangeCRM:

If at any point you cannot sign into your CRM’s main URL, simply go to one of our backup locations by adding a 2 or 3 after your company name/acronym in the URL (see example below). This will take you to a backup data center that is normally running only 10 minutes behind the main URL’s data center.
Main URL: https://yourcompany.orangecrm.com
Backup URL A: https://yourcompany2.orangecrm.com
Backup URL B: https://yourcompany3.orangecrm.com
To log out using the classic interface, hover over the Home Menu and click on Logout Session. You are now completely signed out of the system.
To log out using the interactive interface, go to the home page and click on Logout in the upper right corner.
Your system administrator will assign you the level of access that you require in the CRM. If some of the features shown in this manual are not visible to you, it means that you have not been given access to those functions or roles. Please see your system admin if you need more access.
OrangeCRM has two interface options: classic and interactive. The classic option is the original UI of OrangeCRM, which most users are accustomed to and may continue to use as desired. The new UI is more interactive and is optimized for use on touch devices as well as PCs.
Each individual user is able to set their own preferences by choosing which of the two interfaces they wish to set as their default, while still being able to toggle between them as needed.
How to Switch from Classic to Interactive
In the classic interface, go to the Home menu and click on OrangeCRM Interactive UI.
How to Switch from Interactive to Classic
In the interactive interface, click the Classic button located in the upper right corner of the home page.
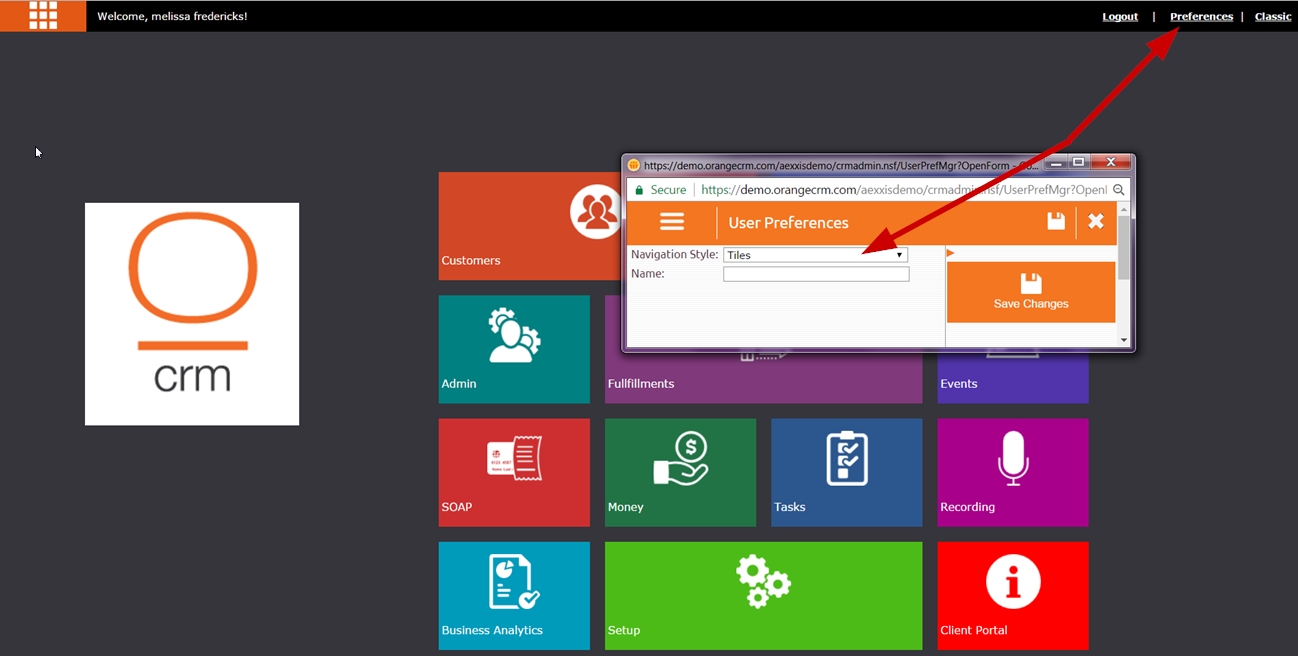
How to Set Your Default Interface Preference
In the interactive interface, click the Preferences button in the upper right corner of the home page.
All edited data must be saved for a record to be updated. Closing the window without clicking on the Save button will cause your edits to be lost.


Click the Refresh button above any display list to confirm that the changes you just made to a record were saved.
 The eyeglasses icon appears beside editable fields and opens a window with a list of available items you can select from to update that field.
 The pencil icon opens the line item beside it for viewing or editing details.
 The paper icon is a shortcut that links you to other areas in the CRM that contain details related to the field it appears next to.
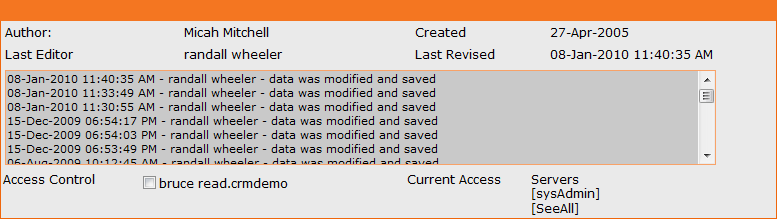
The Access and Revisions tab is found on most records. It shows you the author of the record, date and time the record was created, who the last editor was and the date and time it was last revised.
It also shows a historical list of all modifications that have been made to the record. Each time data is modified and saved, this list is automatically updated with the date and time stamp and the name of the editor.
 None of the data in the Access & Revisions tab can be changed by a system user. This allows all activity to be tracked.